6. Share Collections
Share a file collection with colleagues and decide what they're allowed to do with it.
Last updated 1 day ago
File collections in the File Manager are visible only to you at first. If others should work with the same documents, you share the collection. For each person, you decide whether they can only use the files or also edit them. To learn how to create a collection and upload files, see Upload and Share documents.
Access levels
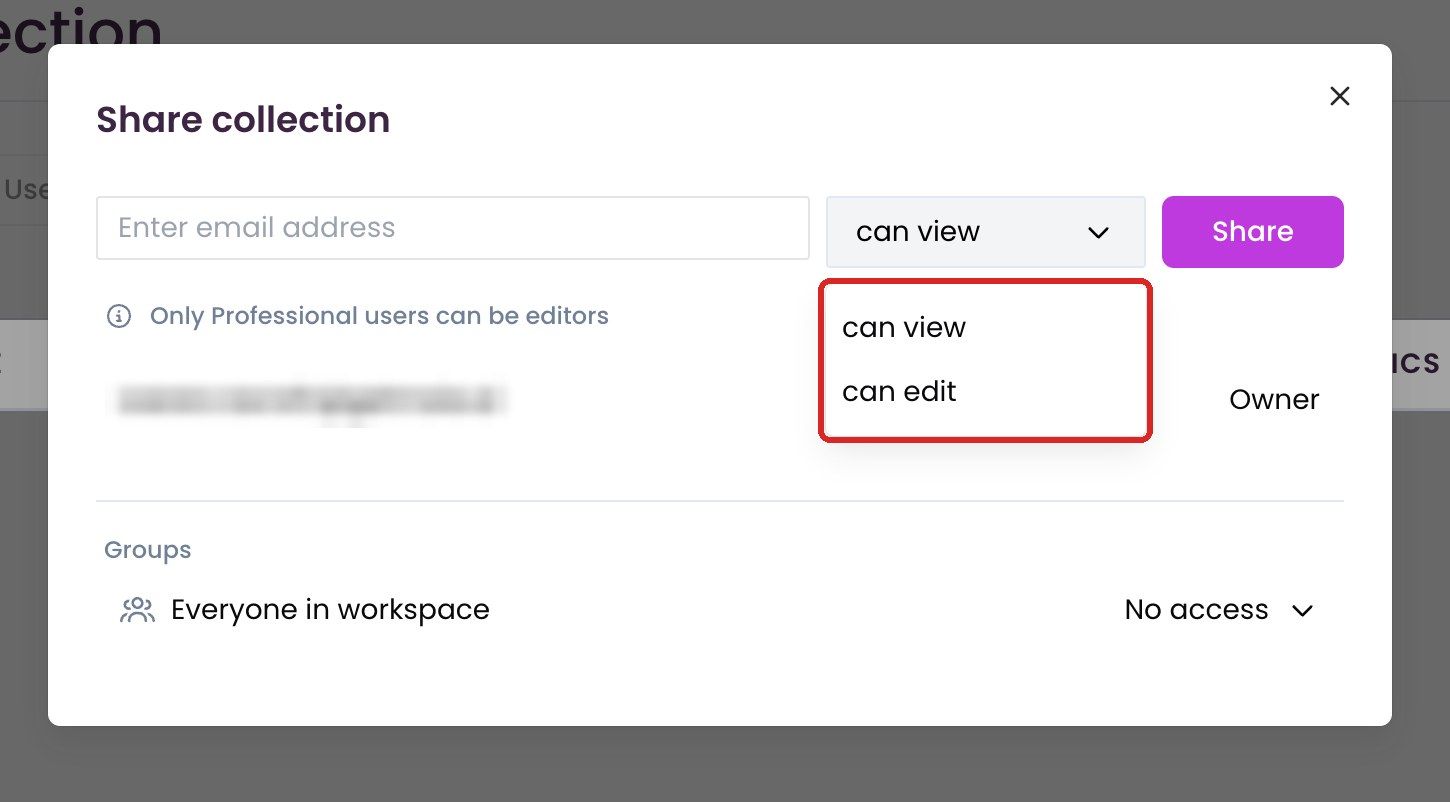
Only people with a Professional license can get “can edit”.
“can edit” alone doesn't allow sharing the collection further. Only the collection owner and people with the “Manager” level can change sharing. You don't pick “Manager” when inviting, but afterwards in the person's row. If you're an admin or owner of the workspace, you can give yourself the Manager role in someone else's collection.
Share a collection with individual people
Open the “File Manager” and select the collection.
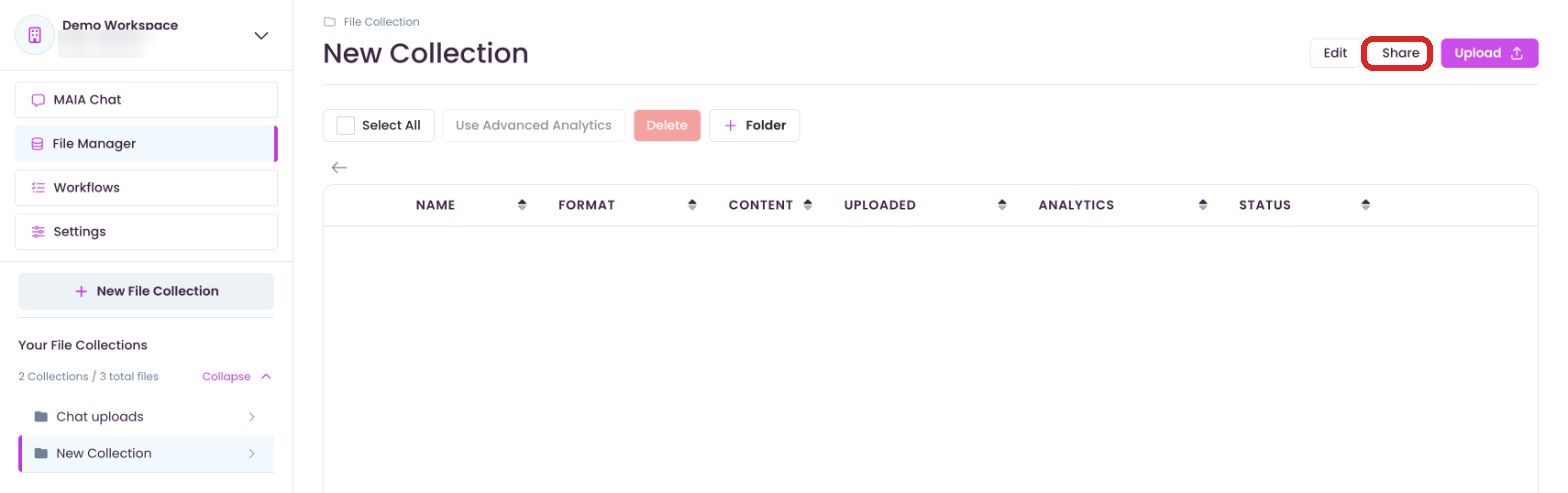
Click “Share” at the top. The “Share collection” dialog opens.
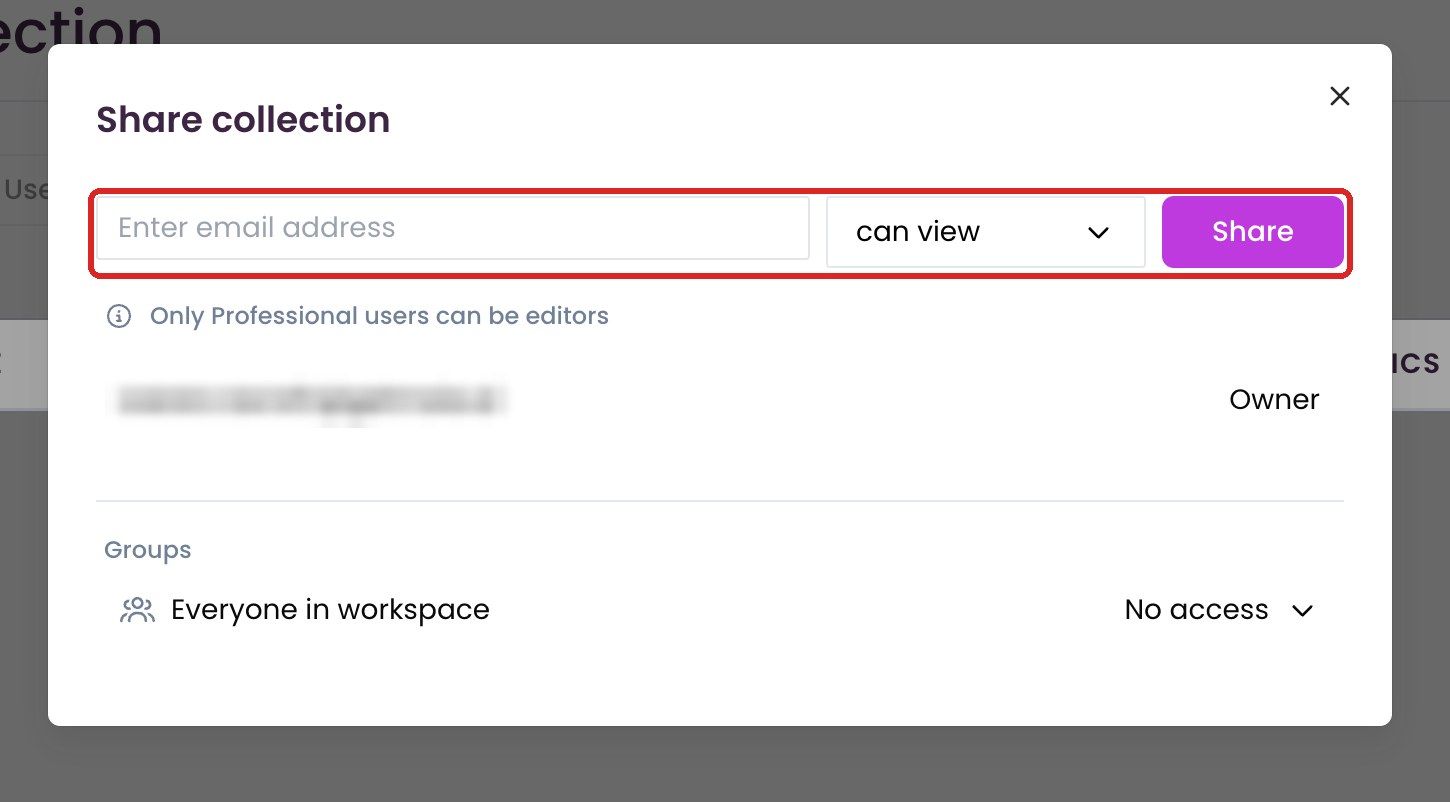
Enter the person's email address in the “Enter email address” field. Upper and lower case don't matter.
Next to it, choose the access level, “can view” or “can edit”.
Click “Share”.
The dialog lists everyone with access. You're marked as “Owner”. The person then finds the collection in the File Manager and in “Select Files” under “Shared with you”.
Change access or stop sharing
Open the collection and click “Share”.
In the person's row, click the access level. Choose another level or “Remove”.
If the options are greyed out, you're neither the owner nor a manager of the collection. Hover over the field and MAIA explains this.
MAIA saves the change right away, without asking you to confirm. This also applies to “Remove”. While a change is being saved, the dialog is briefly locked. Wait until you can use it again before making the next change.
Share a collection with the whole workspace
You can also share a collection with every member of the workspace. This works well for documents everyone needs, such as policies or product documentation.
Open the collection and click “Share”.
Under “Groups” you see “Everyone in workspace”. Change “No access” to “can view”.
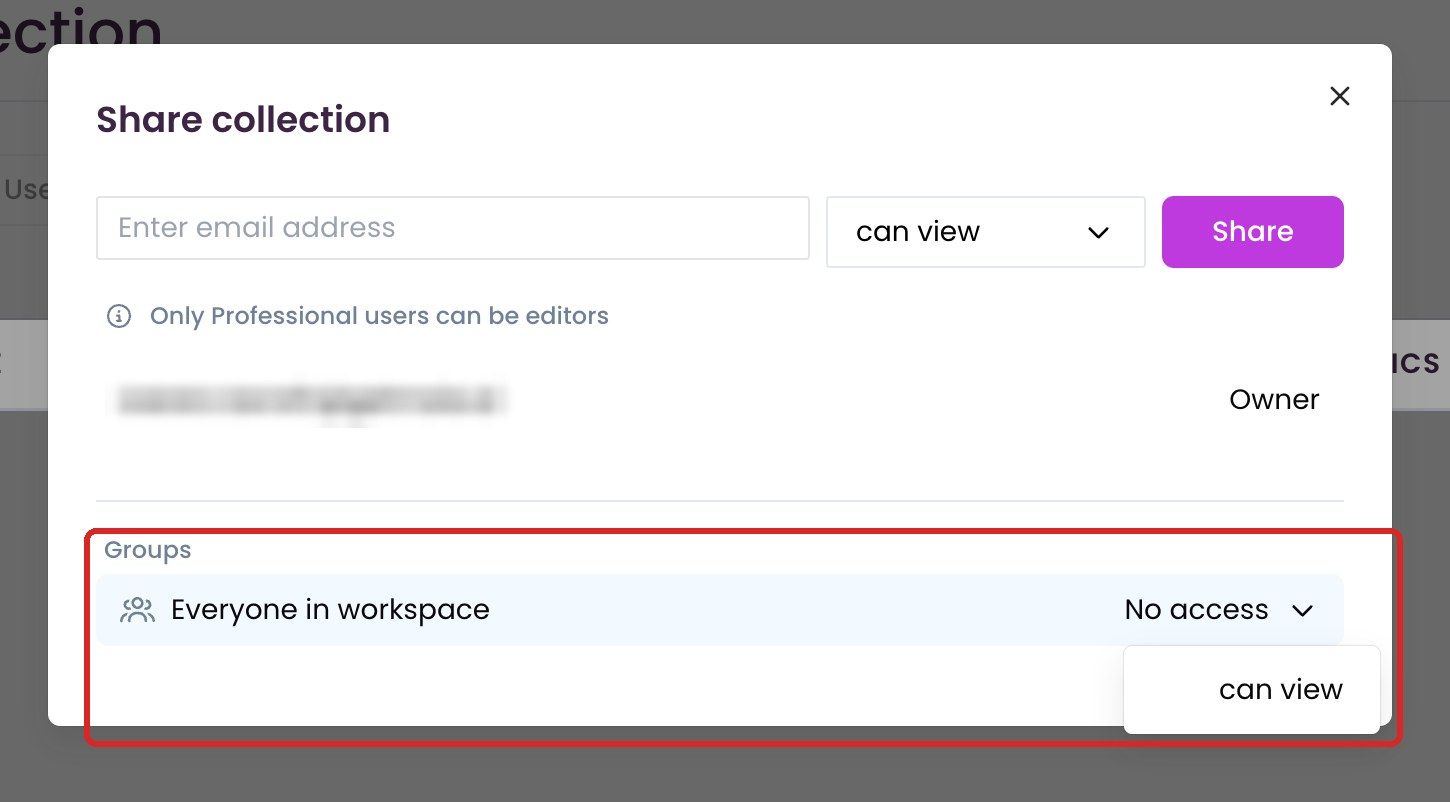
Everyone in the workspace can then see the collection and use its files. Workspace-wide sharing is read-only. If someone should also upload files, give them “can edit” individually.
This applies to anyone who owns or manages the collection, also without admin rights.
Good to know
- Within the workspace only: Sharing applies within the workspace the collection belongs to. You can't share a collection into another workspace.
- Integrations: Files from SharePoint and Confluence follow the permissions of the source system. You don't share them in MAIA, but in SharePoint or Confluence.
- Insights: Knowledge in the Insight Hub that was derived from files is visible to everyone who has access to those files. So when you share a collection, you also widen who sees the related insights.
- Chat uploads: Files you upload directly in chat end up in your “Chat uploads” collection. You can share this collection too.
If you have questions, reach us at support@getmaia.ai.
Was this helpful?
Still need help? Share an idea